Here is information on how you can transfer data from Android to iPhone. With so many choices of smartphones, you tend to go for something different at some point of time in life. Either switching to the latest version of an Android phone, or moving to a windows phone or yet another choice is moving to an iPhone or iPad! Well, in all this excitement of owning the newest phone in the market there is one lingering thought at the back of our minds – What about the data! All the messages, contacts, music, photographs and other downloads that you have saved over the years. Will they have to go? Or will you be able to transfer them to the new handheld? Well, it’s good news – you can transfer your data from your Android which you have been using all these years, to your latest prized possession – your iPhone!

Although the process can be a little tricky, but it definitely can be done. Some operating system dependant things like text messages and call history cannot be transferred, but most of the other data like contacts, photos, videos etc can be transferred easily. Once your iPhone is ready, follow these steps to transfer data from your Android.
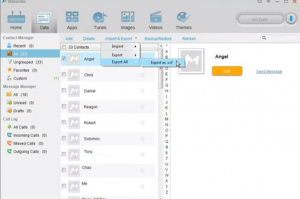
- Contacts: Go to the Contacts on your Android phone, and tap on the menu button. Then tap on import/export option and select export to storage. Select the data you want to transfer – many times it is the phone contacts these days.
- Next, you need to connect your Android phone to your PC via USB. While doing so, select the disk Drive mode. This will enable your phone as a separate drive on your PC. If you do have an SD card in the phone, you may see two disk drives that appear.
- The process after your Android gets detected as a disk drive is pretty simple. All you need to do is create a new folder. You can name it anything – like Data from Android.
- You can then go to the newly detected drives from your android and browse for the data that you need to copy to your iPhone. Drag and drop the data to the new folder. All data that you wish to transfer to the iPhone – photos, videos files etc.
- Now, the important part is to search for a vcf file. Save that file carefully – this will help you transfer all your contacts to your iPhone.
- That completes moving data from the Android to PC. Now all you need to do is move the same data from PC to your newest iPhone!
- Beginning with photos and videos, connect to iTunes on your iPhone. Click on your phone’s name on the side pane and then go the Photos tab on the right pane. Select “Sync Photos”. After that’s done, click on “Close Folder” After you navigate to the Android folder on your PC. Your photos shall be transferred to the Photos app on the iPhone.
- For music, you need to drag the folder from your desktop to the iTunes side pane. This will automatically sync your music to iPhone.
- Contacts could be a little tricky. To transfer your contacts from Android to iPhone, you will need to make sure that your vcf file is safely copied to the folder on your PC. Then make sure that your new iPhone has an email configured. Well, then go back to your PC and email the vcf file to the email id that is configured on the iPhone. Now back at the iPhone, open the email that you sent to yourself with the vcf file attachment, and tap the attachment to open it. Then select “Add all contacts”. That’s it! You have just saved all your contacts from your Android phone to your iPhone!
Well, transferring data from your Android to your iPhone is not as much as troublesome as it sounds! It may take a few steps back and forth from PC to handheld, but it’s definitely not as tricky! Thanks to the technology, today’s electronic devices are compatible or can be made compatible by a few tips and tricks here and there. Switching to a new phone, or a new technology altogether today is not as if you have to start all over. Manually saving data is tedious. Saving one contact at a time like the very old days is history. You can change your mind as many times as possible about your choice of smartphhone and not worry about tedious manual tasks of transferring data. So, go ahead, upgrade your handset to the one of your choice and transfer all your data too without undertaking any hassles!


