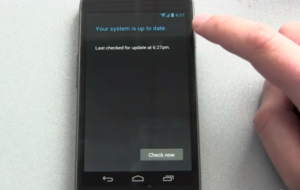
Google’s Android 4.2 Jelly Bean is certainly an all-time interesting and great operating system because it all has the fancy features enhancement, which smartphones users would want. There is a new Android 4.2.1 update, which takes up a 1.1 MB size, and hosts a few changes including a bug fix, which rendered people with anniversaries and birthdays in December without getting a reminder.

The new Android 4.2.1 update is minor but besides fixing the few bugs including the “missing December”, Bluetooth and wireless connectivity, it has some improvement on the Facelock mechanism. Some of the users may have received the update as an over the air (OTA) package but for those who have not, they may opt to get the ZIP package and flush it manually.
Below is a step-by-step guide on how you can update your Nexus 4, 7, and 10 to android 4.2.1 manually.
Caution: It is worthwhile noting that although the updates have been tested, you are solely responsible for action you take on your device. Though the procedure is safe and has been tested by thousands of users, you are held liable for any damage you cause on your device and no other party shall bear the liability.
Requirements
There are requirement before you successful make the update manually they include
- First, you should get the over the air (OTA) update ZIP package and you can easily get this by Googling. You may also get a pre-rooted 4.2.1 package through developer community at XDA.
- The other requirement is that your computer should have the latest version of Android Debug Bridge (ADB) executables readily installed and configured in the PC.
The procedures
Ideally, there are two procedures applied and they will depend on whether you use the stock recovery or custom recovery.
Updating with custom recovery
- First, you need to move the update package for your Nexus device to the root of your internal memory.
- Second, you have to reboot the Nexus phone into recovery mode.
- Third, you select Install ZIP from SD Card, and then select Choose ZIP from SD Card.
- Fourth, you need to point to the update package, and flash it.
- Lastly, you have to reboot your phone and you will be done. After that, you can now enjoy the latest 4.2.1 update on your Nexus 4, 7 or 10 smartphone.
Updating with stock recovery
Although making the Android 4.2.1update on stock recovery image may not be easy, it is also altogether not as difficult as you may imagine. By following these few steps, you can successfully update your Nexus phone.
- First, you need to reboot your Nexus phone by holding and pressing together both Volume Up and Volume Down buttons, and this will lead you to Fastboot menu.
- Secondly, you then select Recovery from the Fastboot menu, and this will lead you to Android doodle, which has a red exclamation sign.
- Thirdly, you need to hold the Volume Up and Power buttons together, after which a new menu pops up. From this menu select, apply update from ADB.
- Fourthly, get your phone connected to the computer using USB cable, and launch a command prompt window. You then have to point to the folder where the update package is located and then run the below command:
adb sideload ZIP_FILE_NAME.zip
Note: Remember to replace the ZIP_FILE_NAME part with the real or exact name of the ZIP package.
- Fifthly, allow your update to complete and then reboot your phone. You will have updated the phone with the 4.2.1 update.


